Quickstart Guide
Contact us on telegram if you have any questions!
Prerequisites and dependencies
The following document assumes that:
- A contemporary Linux distribution (e.g. Debian 12, Ubuntu 24.04, RHEL 9) with libssl and libcrypto libraries is ready to use
- Docker and docker-compose (or docker compose) are installed
- User operating ivynet can control Docker, e.g. is a member of the docker group
sudo usermod -aG docker $USER+newgrp docker
- The user's operator key has already registered as an operator on the Symbiotic and/or EigenLayer networks. If not, go to their respecitve websites:
- All AVSs are deployed with Docker
- You have obtained an ivynet username and password. If not, sign up here.
Installation
The installation of the ivynet client, as well as Docker, can be done with the Ansible role.
- Get the latest binary file from the cloud bucket
- Compare the hash of the downloaded file
sha256 ivynet-{version}with the hash store in the bucket e.g.:https://storage.googleapis.com/ivynet-share/ivynet-{version}.sha256 - Save the file as
ivynetin a folder which is included in the PATH variable, or adjust the variable
Setup and Configuration
- Docker containers must have static names.
- Preferred: Docker containers must have a metrics port exposed for metrics telemetry, with bridge mode preferred.
- 0.5.0 Update: Ivynet client now builds a sidecar to grab network mode host ports directly. If there are any problems here, we still recommend explicitly exposing ports for metrics through bridge network mode.
- Binaries are not supported yet.
Check AVS startup scripts example on this page.
Scan for active Nodes (AVSs)
After the client has been configured, scan the system for running AVSs with:
ivynet scan
The output is an interactive list of all AVSs that Ivynet finds in your local environment.
This occurs in 3 steps.
1. Registration
If the application is started for the first time, it will ask for ivynet website registration details (username and password).
This information is going to be stored in the ~/.ivynet/ivynet-config.toml file along with the node information.
The first line (Node properly registered with key 0x{ecdsa_address}) confirms that registration is successful.
2. Recognized AVSs
IvyNet will automatically recognize your AVSs.
These will be docker containers that have a known image repository on docker's image registry, ghcr.io, gcr.io, etc.
Currently, we support all Symbiotic and EigenLayer mainnet AVSs, as well as most Holesky Eigenlayer AVSs.
Then, the scanner will search though exposed ports for a working /metrics endpoint available at that port.
(No metrics support yet for network mode host).
Select which containers should be monitored by pressing SPACE and ticking the box next to them.
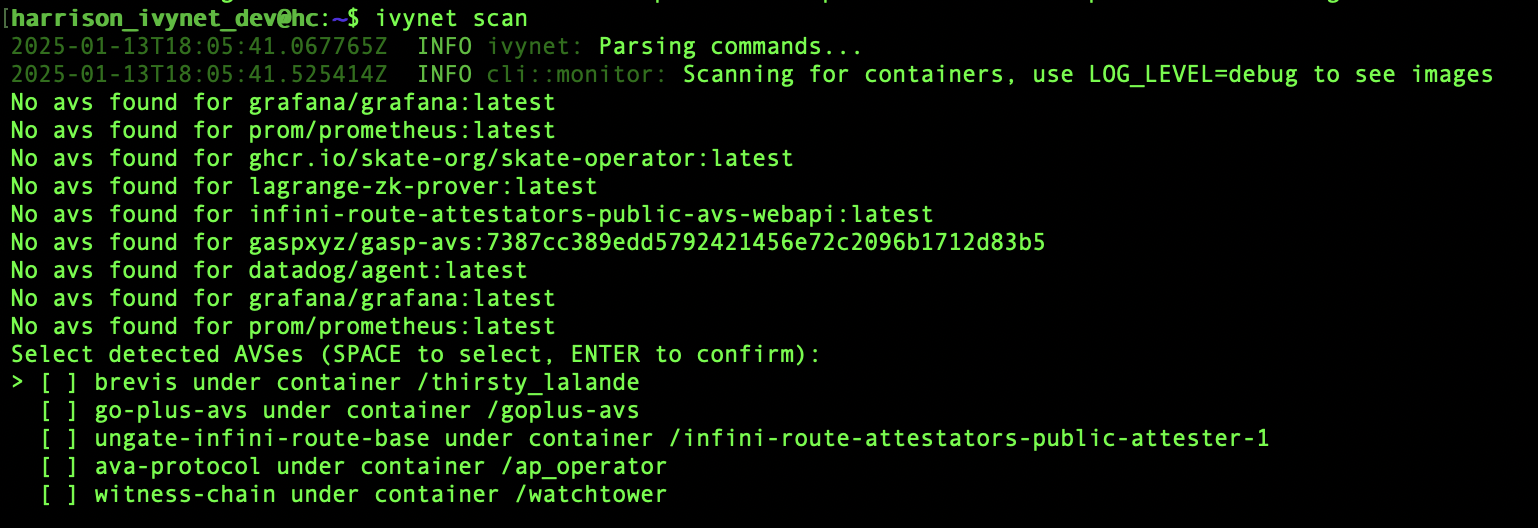
Confirm the selection by pressing ENTER.
3. Manually Added AVSs
IvyNet will also see all running containers.
Enter Y to see a list.

Same as above, select which containers should be monitored by pressing SPACE and confirm the selection by pressing ENTER.
4. Name AVSs
Next step is to name each AVS. The name has to be unique per system with ivynet (e.g. VM).
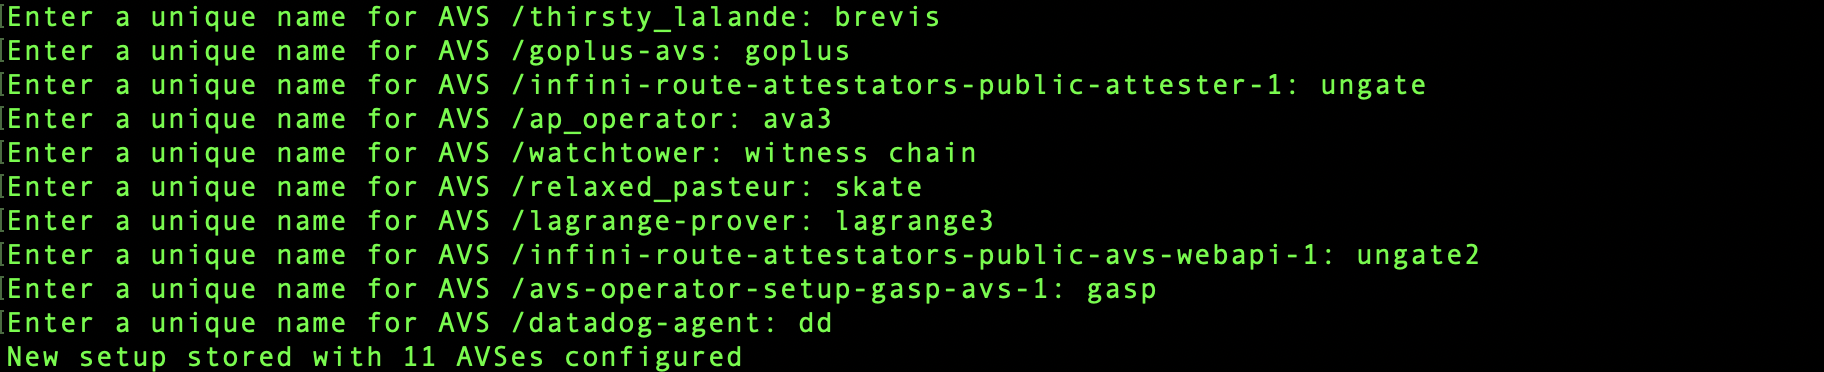 The command will add all AVSs into the
 ~/.ivynet/monitor-config.toml file.
Monitor (Nodes) AVSs
Now, start the monitor with:
ivynet monitor
You will see rapid printouts to the CLI as it evaulates the status of your AVSs, starting with lines that look like this:
2025-02-12T22:14:34.773660Z  INFO ivynet: Parsing commands...
2025-02-12T22:14:34.785607Z  INFO cli::monitor: Starting monitor listener...

After that, the ivynet client will go through and attach listeners to each of your AVSs in order to broadcast their status for viewing in the Ivynet interface.
0.5.0 Update: Monitor no longer requires any user interaction (it has all been moved to scan), feel free to automate restarts in whichever way is most familiar to you.
Interface
Navigate to the Ivynet website and login.

Confirm that information from the nodes are uploaded.
Be sure to add a public operator key and the corresponding chain to maximize metrics experience.

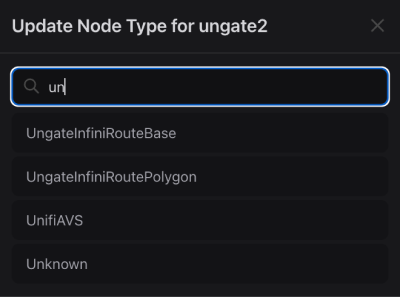
To maximize insights of the manually added AVSs, add a node type.
APIs
All Interface insights and more are accessible through APIs.
Further usage
The ivynet application can be restarted detached from the remote terminal, for example by starting it in a UNIX multiplexer like screen or tmux.
An alternative might be to use the start-stop-daemon tool or prepare a systemd script.
start-stop-daemon example:
start-stop-daemon -b -x {ivynet_dir}/ivynet -S -- monitor
Visit the client documentation for more in-depth information. And when ready: share the feedback!